Running a multilingual conference or large-scale meeting means getting the technical side right before anyone steps up to the microphone. Simultaneous interpreting equipment rental is one of the most critical logistics decisions you’ll face, and one that directly affects whether your audience actually understands what’s being said. The wrong headset count, a weak transmitter signal, or a missing soundproof booth can derail an otherwise well-organized event in minutes. Getting the equipment right matters just as much as hiring the interpreters themselves.
At Languages Unlimited, we’ve been providing interpretation services since 1994, supporting conferences, government proceedings, healthcare settings, and corporate events across all 50 states. Our team works with on-site simultaneous interpretation regularly, which means we understand the technical requirements from the inside, not just the language side, but the hardware, room setup, and logistics that make it all function. That hands-on experience puts us in a strong position to help you plan every detail, from receiver quantities to booth placement.
This guide walks you through how to plan your simultaneous interpreting equipment rental from start to finish. You’ll learn what hardware you actually need, how to estimate quantities, what questions to ask vendors, and how to avoid common mistakes that lead to wasted budget or poor audio quality. Whether you’re organizing a federal agency briefing, a medical symposium, or an international business summit, this article gives you a practical framework to get the equipment side locked down with confidence.
What simultaneous interpreting equipment includes
Before you request a quote or compare rental packages, you need to know what you’re actually ordering. Simultaneous interpreting equipment rental covers a specific set of hardware components that work together as a connected system. Each component plays a defined role, and missing even one piece disrupts the entire audio chain from interpreter to attendee. Understanding what goes into that system helps you evaluate rental proposals intelligently, ask the right questions, and catch gaps before they become problems on event day.
Interpreter consoles
The interpreter console sits at the heart of the setup. It’s the control unit your interpreters use to manage audio input and output during the event. A standard console gives interpreters a microphone, volume controls, a channel selector, and a slow-down request button to signal speakers who are moving too fast. Most professional events require one console per language pair, with each console typically supporting two interpreters who rotate every 20 to 30 minutes to prevent fatigue. When reviewing a rental quote, confirm that the console model supports the number of language channels your event requires.
Soundproof interpreter booths
Booths are what separate your interpreters from the ambient noise of the room. Without a proper booth, interpreters pick up background sound from the audience and PA system, which degrades both their concentration and the audio quality they deliver. Portable booths designed for event use are modular and can be assembled in most conference rooms or ballrooms within a few hours. ISO 4043 is the international standard that governs portable simultaneous interpretation booths, covering dimensions, soundproofing levels, and ventilation requirements. If your rental vendor cannot confirm their booths meet this standard, ask for documentation before you sign anything.
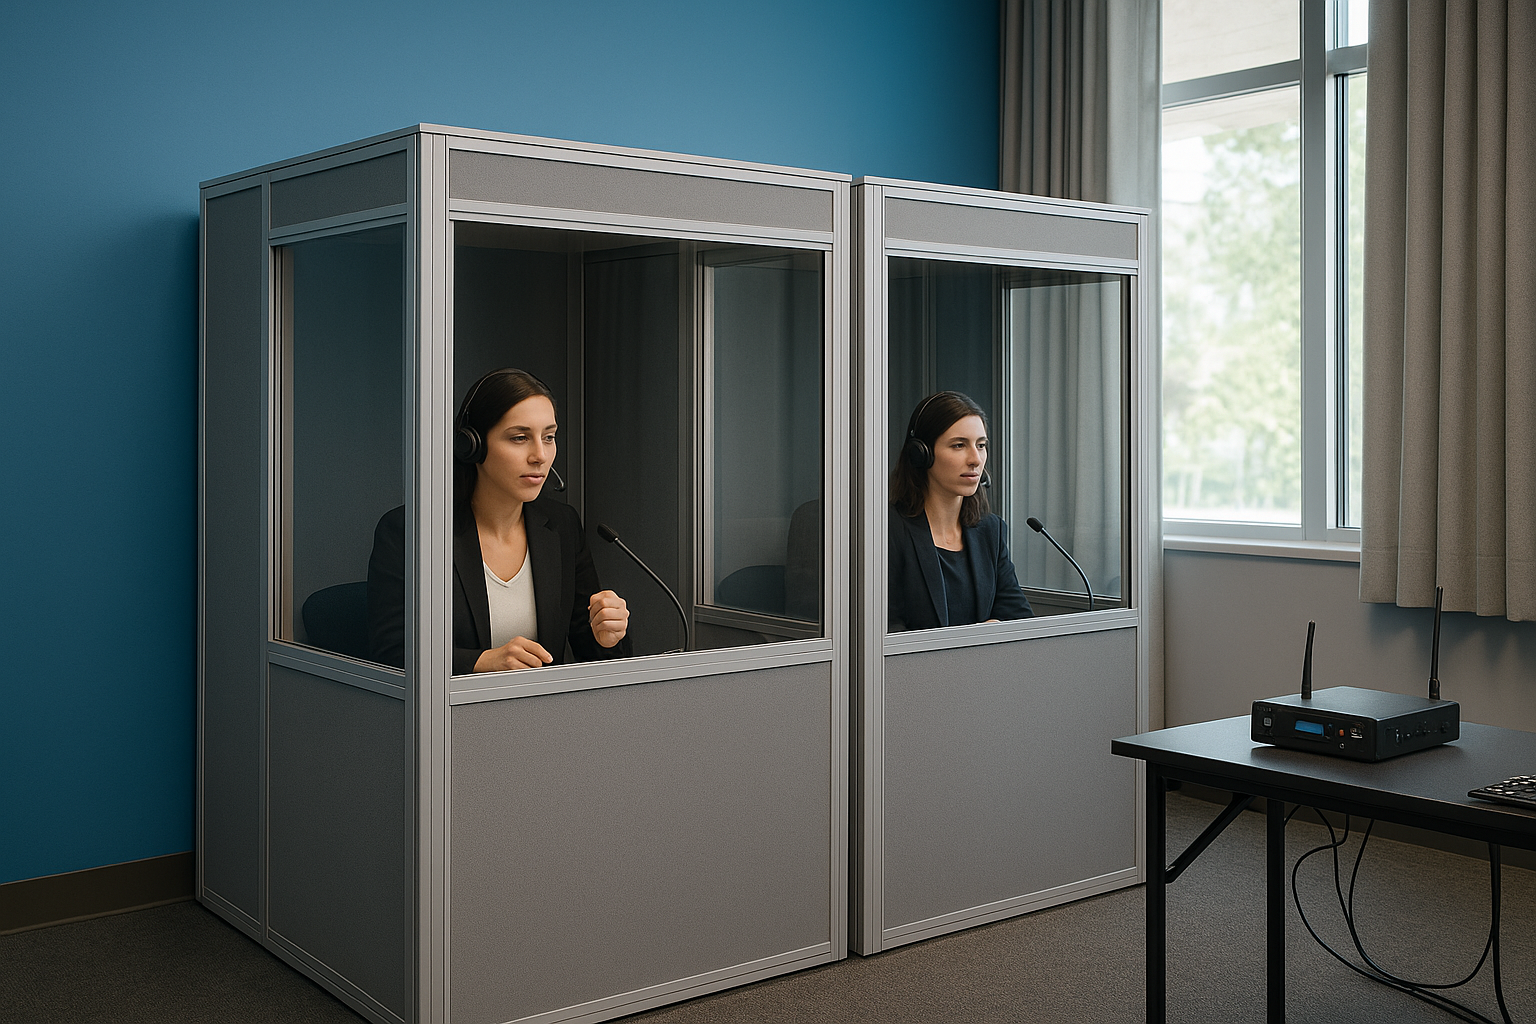
The booth requirement is non-negotiable for large events: poor soundproofing directly degrades interpretation quality and can make an entire language channel unusable for your audience.
Receivers and headsets
Receivers are the small handheld or clip-on devices your attendees use to listen to interpreted audio in their chosen language. Each receiver pairs with a headset or earpiece, and attendees select their language channel using a dial or button on the device. Plan for one receiver per attendee who needs interpretation, plus a buffer of 10 to 15 percent for latecomers, replacements, and VIP guests who may arrive after distribution. Battery life is a real logistical concern: most units run six to eight hours on a full charge, so multi-day events require a charging station and a plan for rotating devices between sessions.
Transmitters and audio distribution hardware
The transmitter is the broadcast backbone of your system. It takes the audio signal from the interpreter’s console and sends it wirelessly to all attendee receivers simultaneously. Transmitters come in three main technology types: radio frequency (RF), infrared (IR), and digital portable systems, each with different coverage range, interference risk, and security characteristics. You’ll also need supporting hardware such as audio splitters, floor boxes or tie lines connecting the interpreter booth to the main PA system, and a technician’s mixing board if your event uses live audio from multiple microphone sources or presentation feeds.
Tour guide and portable systems
For smaller meetings, breakout sessions, or factory floor tours, tour guide systems offer a lighter alternative to full booth-and-console setups. These consist of a small handheld transmitter the guide or speaker carries and compact receivers worn by listeners. Coverage is limited to roughly 50 meters, making them unsuitable for large rooms, but they work well for groups of 10 to 30 people in controlled environments. Knowing this option exists helps you match the right hardware scale to each session type within a larger multi-track event.
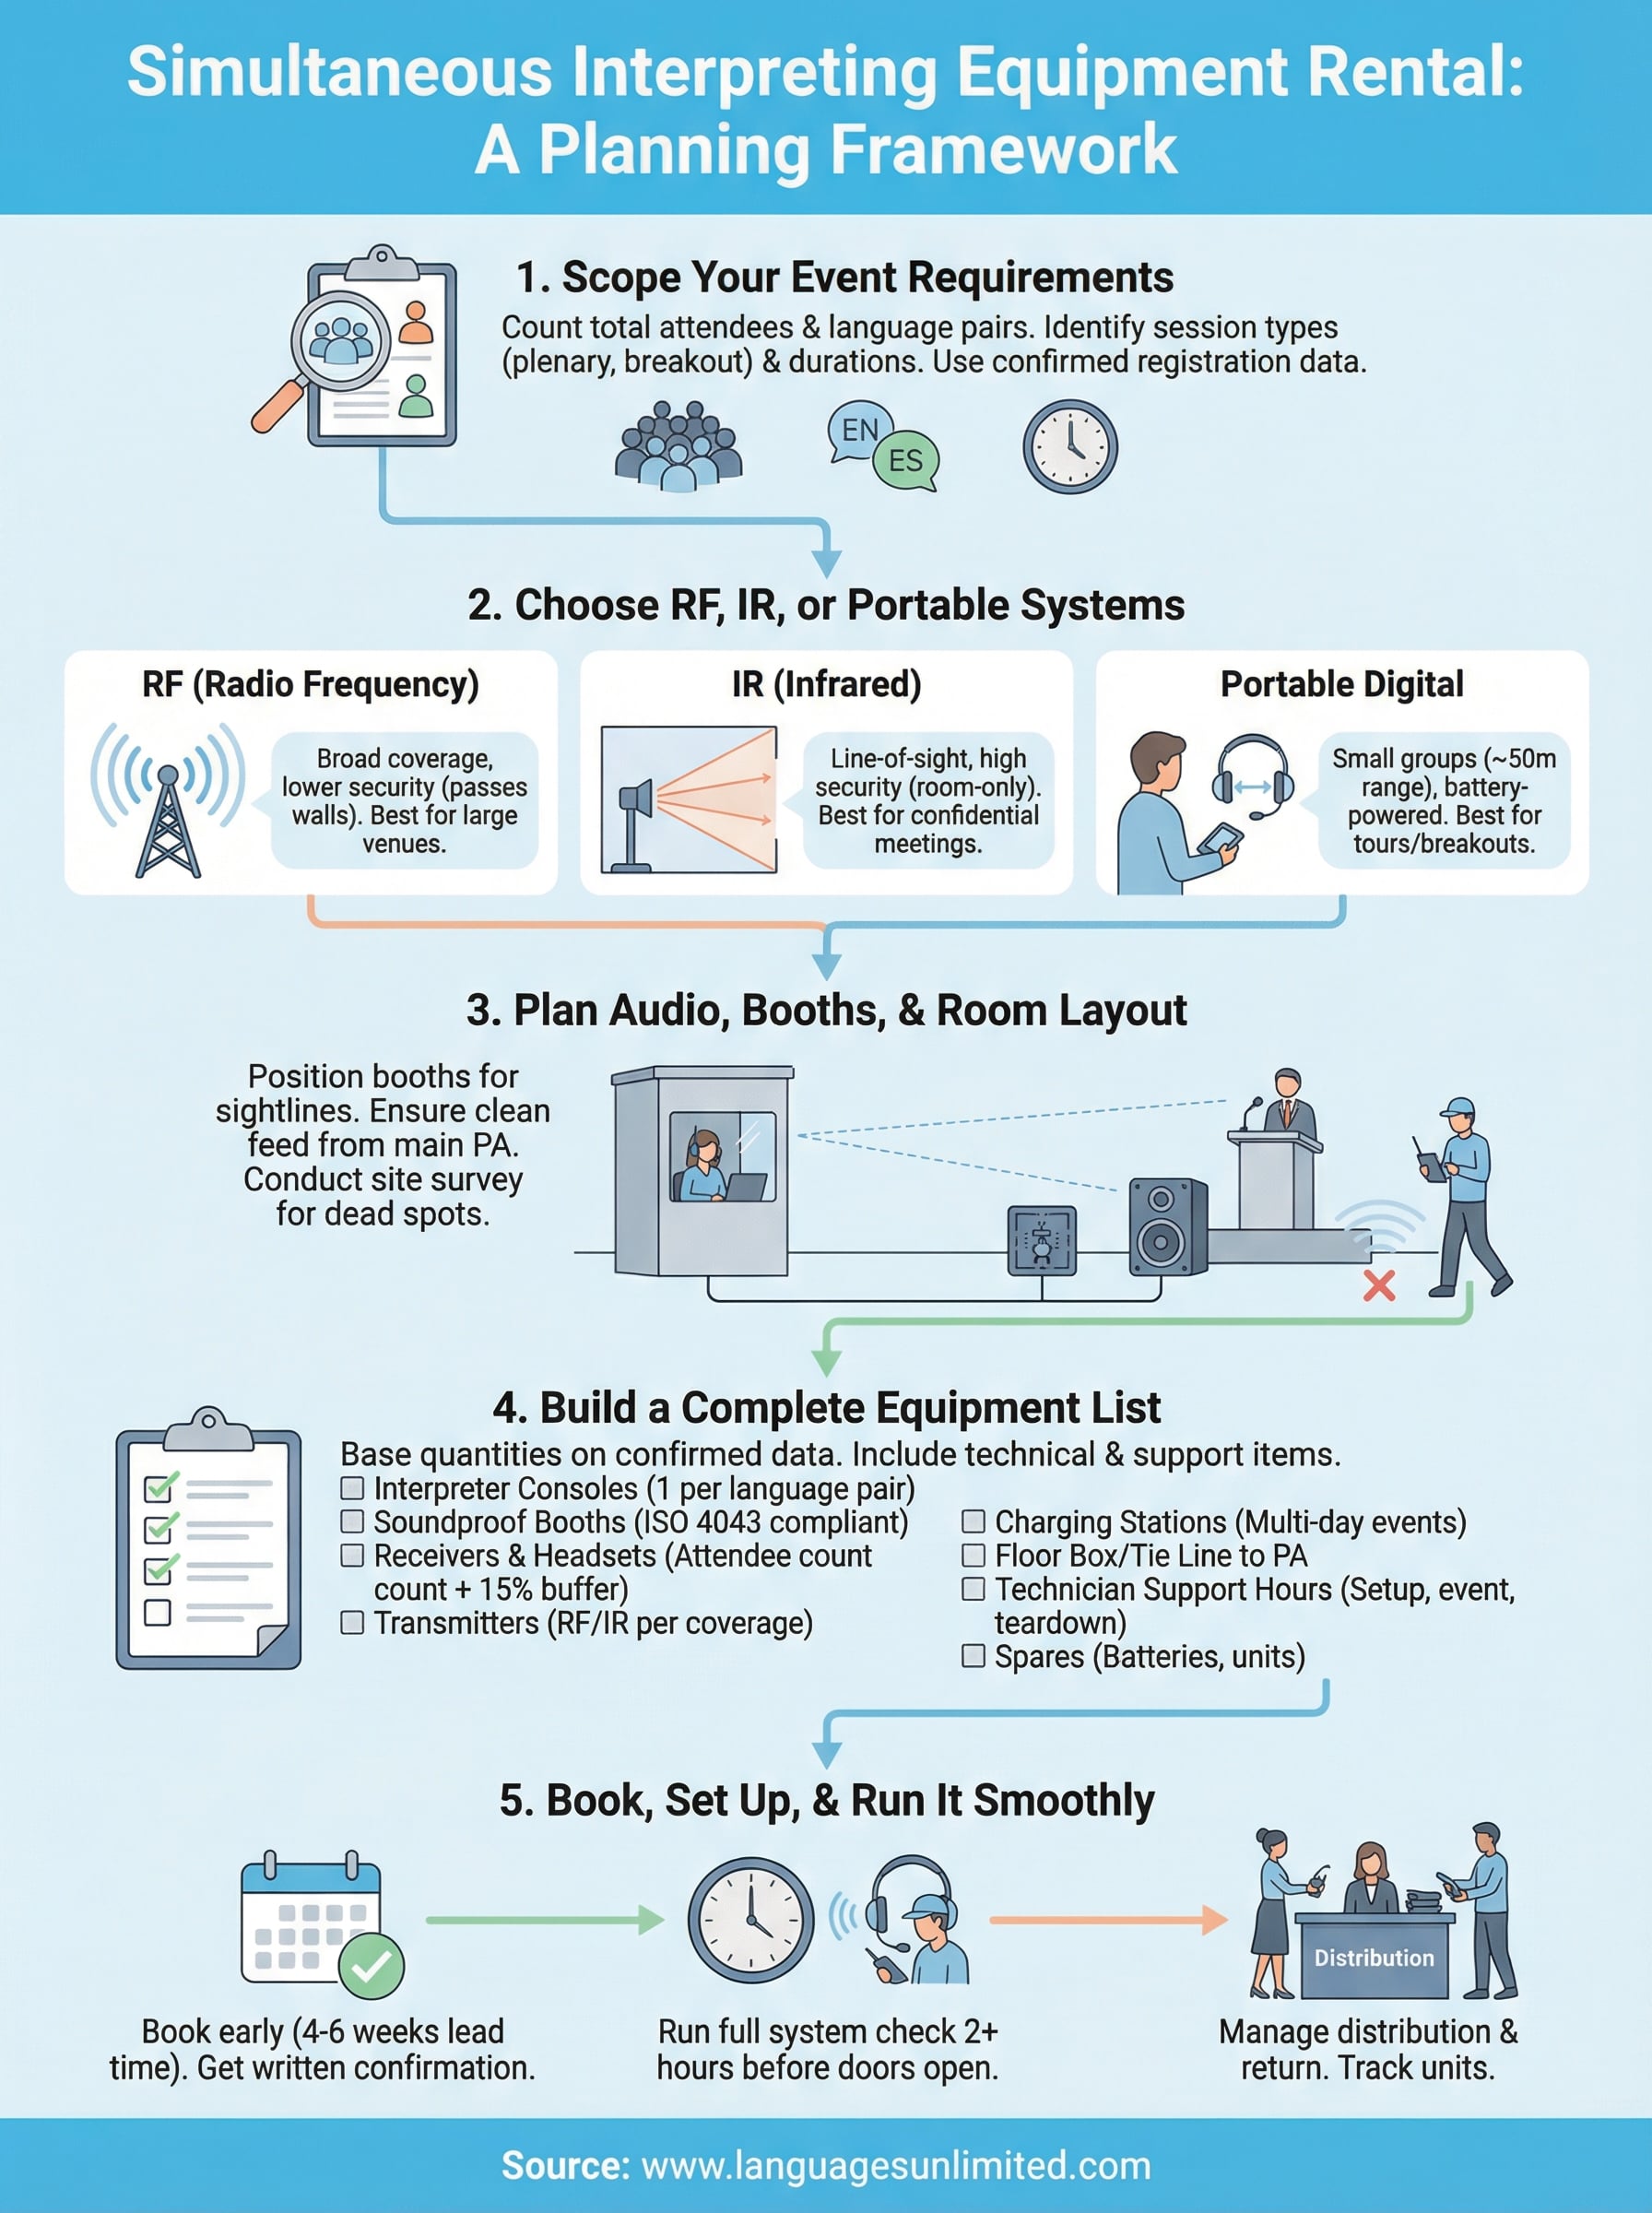
Step 1. Scope your event requirements
Scoping your requirements upfront saves you from ordering the wrong quantity of receivers, underestimating the number of booths, or discovering a mismatch between your room layout and the transmitter system on setup day. Every decision in your simultaneous interpreting equipment rental process flows directly from the answers you gather in this step. Before you contact a single rental vendor, build a clear picture of what your event actually demands.
Count your attendees and language pairs
Your total attendee headcount and the number of language pairs you need to support are the two most important numbers in your planning. Start by pulling confirmed registration data and identifying what percentage of attendees need interpretation. For example, if you have 400 registered attendees and 60 percent require Spanish interpretation, you need at least 240 receivers for that channel, plus your 10 to 15 percent buffer. Each active language pair requires its own interpreter console and dedicated audio channel, so a three-language event is fundamentally more complex than a bilingual one.
Never estimate receiver count based on total room capacity alone. Use confirmed registration data filtered by language need to get an accurate number.
Identify session types and duration
Not every session in your event carries the same interpretation requirements. Plenary sessions with large audiences require a full booth-and-console setup, while a breakout workshop with 20 people might work on a portable tour guide system instead. Walk through your agenda and label each session by type, expected attendance, and language support needed. Multi-day events also raise battery management concerns, since most receivers run six to eight hours before needing a charge, which means you need a rotation and charging plan for any event spanning more than a single morning.
Build your scoping worksheet
Use this template to capture everything in one place before you start requesting quotes:
| Field | Your Answer |
|---|---|
| Total attendees needing interpretation | |
| Number of active language pairs | |
| Number of plenary sessions | |
| Number of breakout sessions | |
| Event duration (days / hours) | |
| Venue room dimensions (approximate) | |
| Booth setup access window | |
| On-site technical support required |
Fill in every row before you call a vendor. A complete worksheet lets rental companies give you accurate quotes on the first call rather than issuing a placeholder estimate that changes three times before your event date.
Step 2. Choose RF, IR, or portable systems
Once you have your attendee count and session types from Step 1, your next decision is which transmission technology to use. The three main options for simultaneous interpreting equipment rental are radio frequency (RF), infrared (IR), and portable digital systems. Each carries different trade-offs around coverage, security, and setup complexity, so picking the wrong one for your venue creates problems that no amount of last-minute troubleshooting will fix on event day.
Radio frequency (RF) systems
RF systems transmit audio signals over licensed or unlicensed radio bands, giving them the broadest coverage range of the three options. A single RF transmitter can cover an entire convention center floor without signal degradation, making this the right choice for large ballrooms, outdoor venues, or multi-room events where attendees move between spaces. The main downside is security: RF signals pass through walls, which means anyone with a compatible receiver outside your event can listen in. For corporate meetings with sensitive discussions or government briefings, address that risk directly with your vendor before finalizing your system choice.
Infrared (IR) systems
IR systems use light-based transmission that cannot penetrate walls, which makes them the preferred choice for confidential events such as board meetings, legal proceedings, or classified government briefings. Because the signal stays within the room, there is no risk of external interception. The trade-off is that IR requires line-of-sight between transmitters and receivers, so pillars, poor emitter placement, or attendees sitting in signal shadows can cause dead spots. Ask your vendor to conduct a room survey before finalizing the emitter layout for any IR deployment.

IR is the right default for any event where confidentiality is a contractual or legal requirement, not simply a preference.
Portable digital systems
Portable systems, sometimes called tour guide systems, are battery-powered and require no installed transmitters or fixed infrastructure. A speaker or interpreter carries a small handheld unit, and each listener wears a compact receiver with an earpiece. Coverage tops out around 50 meters, which limits these systems to small groups of 10 to 30 people in controlled environments. Use them for breakout workshops, site tours, or VIP briefings where setting up a full booth-and-console system would be disproportionate to the session size.
| System Type | Best For | Signal Range | Security Level |
|---|---|---|---|
| RF | Large venues, multi-room events | 300+ meters | Low (passes through walls) |
| IR | Confidential meetings, legal proceedings | Room-only | High (line-of-sight only) |
| Portable digital | Small groups, breakout sessions | ~50 meters | Medium |
Step 3. Plan audio, booths, and room layout
The physical layout of your venue determines whether your interpreters can do their job well and whether your attendees receive clean audio from start to finish. Room acoustics, booth placement, and audio routing all interact with each other, so treating them as separate decisions leads to gaps that only surface during setup. Locking down your room plan in advance is one of the most practical steps in any simultaneous interpreting equipment rental process, particularly for venues you haven’t used before.
Position your interpreter booths correctly
Booth placement directly affects how well your interpreters monitor the speaker and the room. Standard practice places booths at the rear or side of the room, at an elevated position that gives interpreters a clear sightline to the speaker, the projection screen, and any visual aids being used. Avoid locations behind structural pillars or anywhere the interpreter cannot see the presenter clearly, since visual context is critical to accurate simultaneous interpretation.
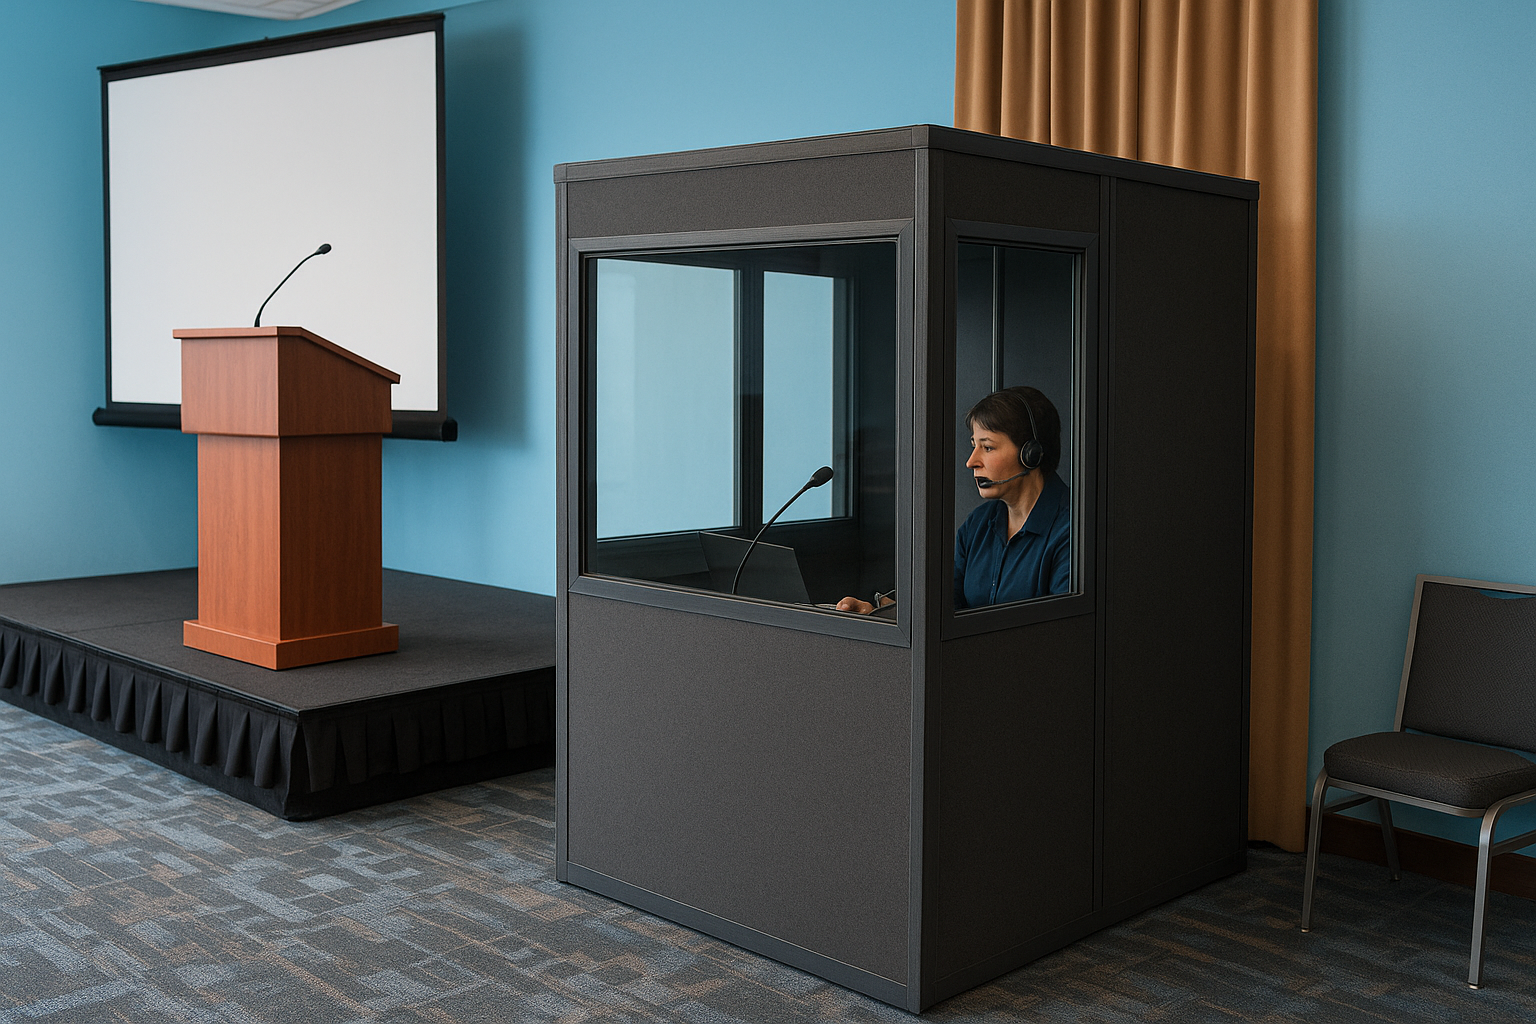
Poor booth placement forces interpreters to work blind, which increases errors and slows output regardless of how good the equipment is.
Use this checklist when assessing booth position in any venue:
- Clear sightline to the main stage or speaker podium
- Power outlet within reach of console cabling
- Enough floor space for two interpreters to work and rotate
- Proximity to the audio feed connection point (tie line or floor box)
- Adequate ventilation for extended use
Connect the interpreter booth to your main audio system
Your booth must receive a clean feed from the main PA system so interpreters hear exactly what the room is playing, including speaker microphones, panel mics, and presentation audio. A floor box or tie line runs from the venue’s audio desk directly to the interpreter console. Confirm with your rental vendor that this connection is included in the package and that a technician handles the routing on setup day.
Ask your AV team for a technical rider or stage plot ahead of time. That document shows where tie lines and audio outputs are located, which helps your rental vendor plan the cable run without improvisation on the event day.
Check for signal dead spots before the event
Dead spots are areas in the room where receiver signal drops or becomes unreliable, typically caused by physical obstructions, poor emitter placement, or interference from other wireless systems in the building. Request a site survey from your vendor at least two weeks before your event. During the survey, a technician walks the room with a test receiver to map coverage and flag problem areas.
Document the results in writing so you have a reference point when the system is installed. If the survey reveals dead spots, the vendor adjusts emitter placement or adds supplementary units to fill the gaps before your attendees arrive.
Step 4. Build a complete equipment list
With your transmission system selected and your room layout mapped, you’re ready to consolidate everything into a single, structured document. A complete equipment list is the foundation of your simultaneous interpreting equipment rental request, giving vendors the exact quantities and specifications they need to issue an accurate quote. Without it, you risk receiving a proposal that covers some items while quietly omitting others, which leads to surprise charges once your event is underway.
Start with your confirmed numbers
Pull the data from your scoping worksheet in Step 1 and translate each row into a specific equipment quantity. Every figure on your list should trace back to a real number, such as confirmed attendees by language or the number of plenary sessions in your agenda, rather than a rough guess.
An equipment list built on confirmed data gives you real leverage when comparing vendor quotes and prevents you from overpaying for units you don’t need.
Use this template as your starting point:
| Equipment Item | Quantity Needed | Notes |
|---|---|---|
| Interpreter consoles | 1 per language pair | Confirm channel capacity |
| Soundproof booths (ISO 4043) | 1 per language pair | Confirm dimensions fit venue |
| Receivers | Attendees needing interpretation + 15% buffer | Include spares for VIPs |
| Headsets or earpieces | Match receiver count | Hygiene kits if multi-day |
| RF or IR transmitters | Per vendor coverage specs | Confirm room coverage map |
| Charging stations | 1 per 50 receivers | Critical for multi-day events |
| Floor box or tie line to PA | 1 per booth | Confirm with AV team |
| Technician support hours | Per day of event | Include setup and teardown |
Fill in every row before you send the list to vendors. Incomplete requests result in partial quotes that are nearly impossible to compare side by side.
Add technical and support items
Beyond the core hardware, your list needs to include items that are easy to overlook but critical on event day. Spare batteries, backup receivers, and hygiene accessories for multi-day events are recurring gaps in rental orders that cause real operational problems. Add a line for each of these explicitly rather than assuming the vendor includes them as a default.
On-site technician hours are another item you should list explicitly, including setup time, the duration of each program day, and teardown. Vendors price technical support differently, and having it on your list ensures you get a direct comparison rather than discovering a hidden labor fee after you’ve already selected a supplier.
Step 5. Book, set up, and run it smoothly
Your equipment list and room plan are complete, so now it’s time to move from planning into execution. Booking, setting up, and managing your simultaneous interpreting equipment rental on the day of your event each carry their own set of tasks, and handling them in the right sequence prevents the last-minute scrambles that derail even well-organized events. Treat this final step as three distinct phases: the booking window, the setup period, and the live event management plan.
Lock in your booking with enough lead time
Send your completed equipment list to at least three vendors and request itemized quotes so you can compare each line directly. Give yourself a minimum of four to six weeks before your event date, since popular rental inventory books out quickly around conference season. Confirm the following items in writing before you sign any rental agreement:
- Delivery window and on-site setup time included in the quote
- Technician coverage hours for setup, the full event day, and teardown
- Replacement policy for faulty units during the event
- Deposit amount and final payment deadline
- Pickup or return logistics for the equipment after the event closes
Once you select a vendor, get a signed confirmation that lists every item by model and quantity. A verbal agreement is not enough to hold inventory.
Run a full system check before doors open
Schedule your setup to finish at least two hours before your first attendees arrive. Use that window to run a complete systems test: power on every receiver, cycle through each language channel, and confirm clean audio from the interpreter console to attendee headsets across every corner of the room.
A two-hour buffer before doors open is the minimum you need to catch and fix a dead spot, a faulty transmitter, or a misconfigured audio feed without pressure.
Walk the room yourself with a test receiver rather than relying solely on the technician’s report. You’ll catch signal gaps near seats that the technician may not have tested from a seated position.
Manage equipment distribution during the event
Assign a staff member specifically to receiver distribution at the entrance so attendees collect the right device and channel card before they sit down. Set up a small return station near each exit for attendees to return equipment as they leave, which reduces loss and speeds up your inventory count at the end of each day. Track units handed out and returned on a simple tally sheet to identify missing receivers before the vendor arrives for pickup.
What to do next
You now have a complete framework for planning your simultaneous interpreting equipment rental, from identifying the right transmission system to building a detailed equipment list and managing distribution on event day. The steps in this guide give you the structure to approach vendors with confidence, compare quotes accurately, and avoid the setup mistakes that hurt audio quality when it matters most.
The next practical step is to confirm your attendee count and language pairs, then complete the scoping worksheet from Step 1. Once those numbers are in hand, you’re ready to request itemized quotes from vendors and lock in your booking with enough lead time to avoid inventory shortages.
If you want expert guidance on simultaneous interpretation for your event, including both the language professionals and the technical logistics, contact the Languages Unlimited team to discuss your specific requirements and get a quote.