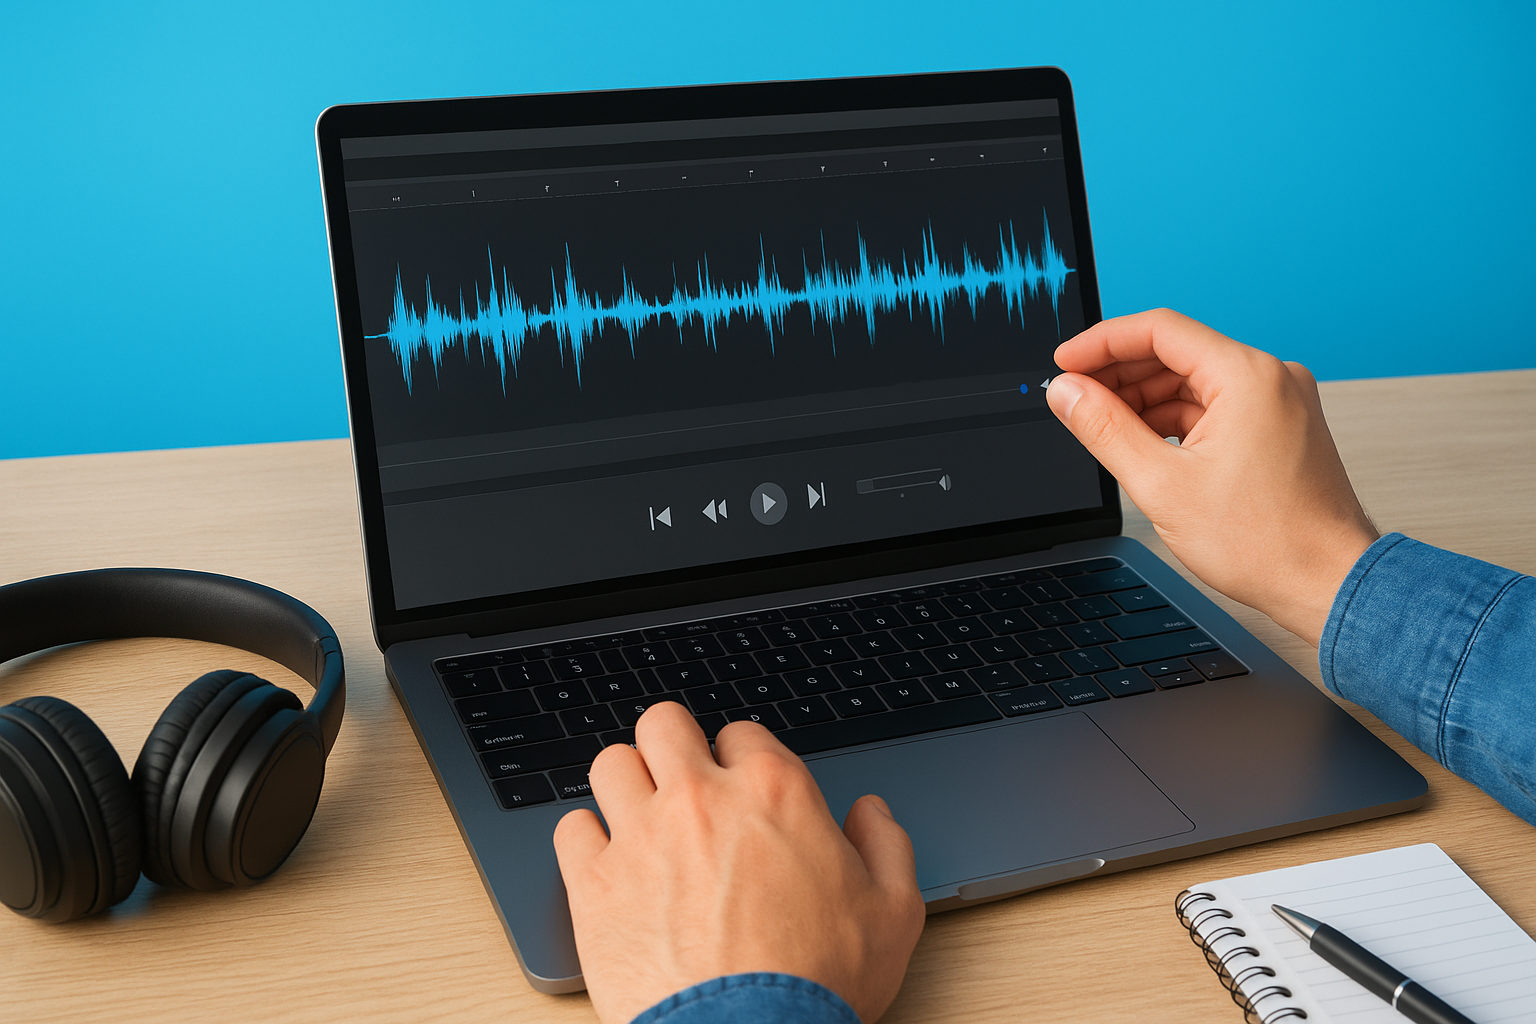
Whether it’s a recorded deposition, a medical consultation, or a multilingual conference call, turning spoken audio into accurate written text starts with one step: you upload audio for transcription. It sounds simple enough, but the quality of your final transcript depends heavily on how you prepare and submit that file. File format, audio clarity, and the service you choose all play a role in what you get back.
At Languages Unlimited, we’ve handled transcription projects across legal, medical, government, and corporate sectors since 1994. Our network of over ten thousand language professionals processes audio in hundreds of languages and dialects, so we’ve seen firsthand what makes the difference between a smooth transcription workflow and a frustrating one. From poorly compressed recordings to files with heavy background noise, the mistakes tend to repeat themselves, and they’re almost always preventable.
This guide walks you through exactly how the upload-to-transcript process works, what file types and formats produce the best results, and how to prepare your audio before you submit it. You’ll also learn what to look for in a transcription provider and how to avoid common pitfalls that slow down turnaround times or compromise accuracy. Whether you’re handling a one-time project or managing recurring transcription needs for your organization, this article gives you a clear, practical path from raw audio to polished transcript.
What it means to upload audio for transcription
When you upload audio for transcription, you’re submitting a recorded audio or video file to a service or platform that converts the spoken content into written text. The process sounds straightforward, but it involves several layers of decision-making before and after that upload. File format, recording quality, speaker count, and language all influence what you receive at the end, and understanding the mechanics helps you avoid unnecessary delays or accuracy problems.
Getting familiar with the process before you submit your first file saves time and prevents the most common errors that slow down or compromise your project.
What transcription actually converts
Transcription converts spoken language into a written document. That document can take different forms depending on your needs. Verbatim transcription captures everything spoken, including filler words like "um" and "uh," false starts, and background commentary. Clean read transcription removes those elements and produces a polished, readable version of what was said. A third option, intelligent verbatim, sits between the two: it keeps the speaker’s natural phrasing but cuts obvious filler. Your choice affects both the turnaround time and how a professional transcriptionist or automated system processes your file.
Most transcription services accept a range of common audio and video formats. Here’s a quick overview of what you’ll typically encounter:
| Format | Type | Common Use Case |
|---|---|---|
| MP3 | Audio | Interviews, podcasts, phone calls |
| WAV | Audio | High-quality studio or legal recordings |
| MP4 | Video | Conferences, depositions, medical consultations |
| M4A | Audio | Mobile device recordings |
| FLAC | Audio | Lossless archive recordings |
What happens after you upload
Once you submit your file, the transcription workflow begins immediately. Automated systems use speech recognition engines to generate a raw draft in minutes, while human transcriptionists review the audio, often assigned based on subject matter expertise. For legal depositions or medical consultations, specialized professionals handle the file to ensure terminology is accurate and context is preserved.

Your file typically passes through a quality review step before delivery. In human transcription workflows, a second reviewer checks the draft for speaker labels, formatting accuracy, and terminology errors. Automated platforms may skip this step entirely, which is why AI-generated transcripts vary significantly in accuracy based on audio quality and accent diversity. Knowing this helps you set realistic expectations before you receive your document.
Why audio quality is the biggest variable
The single factor that most affects transcript accuracy is the quality of your source recording. A clean file with minimal background noise produces a far more accurate transcript than a compressed phone recording with multiple overlapping speakers. Sample rate and bitrate matter too: recordings at 44.1 kHz with a 128 kbps bitrate or higher give transcriptionists and speech recognition engines more audio data to work with, resulting in fewer interpretation errors.
Low-quality files often require additional processing time and may result in more errors, even when handled by experienced professionals. Before you upload, it’s worth auditing your recording for these common problems:
- Heavy background noise or echo
- Multiple speakers talking simultaneously
- Low volume or muffled audio from poor microphone placement
- Compressed formats with significant data loss (such as low-bitrate MP3s)
- Long periods of silence mixed with fast speech bursts
Catching these issues early gives you the opportunity to re-record, clean the audio, or flag problem sections for your transcription provider before submission.
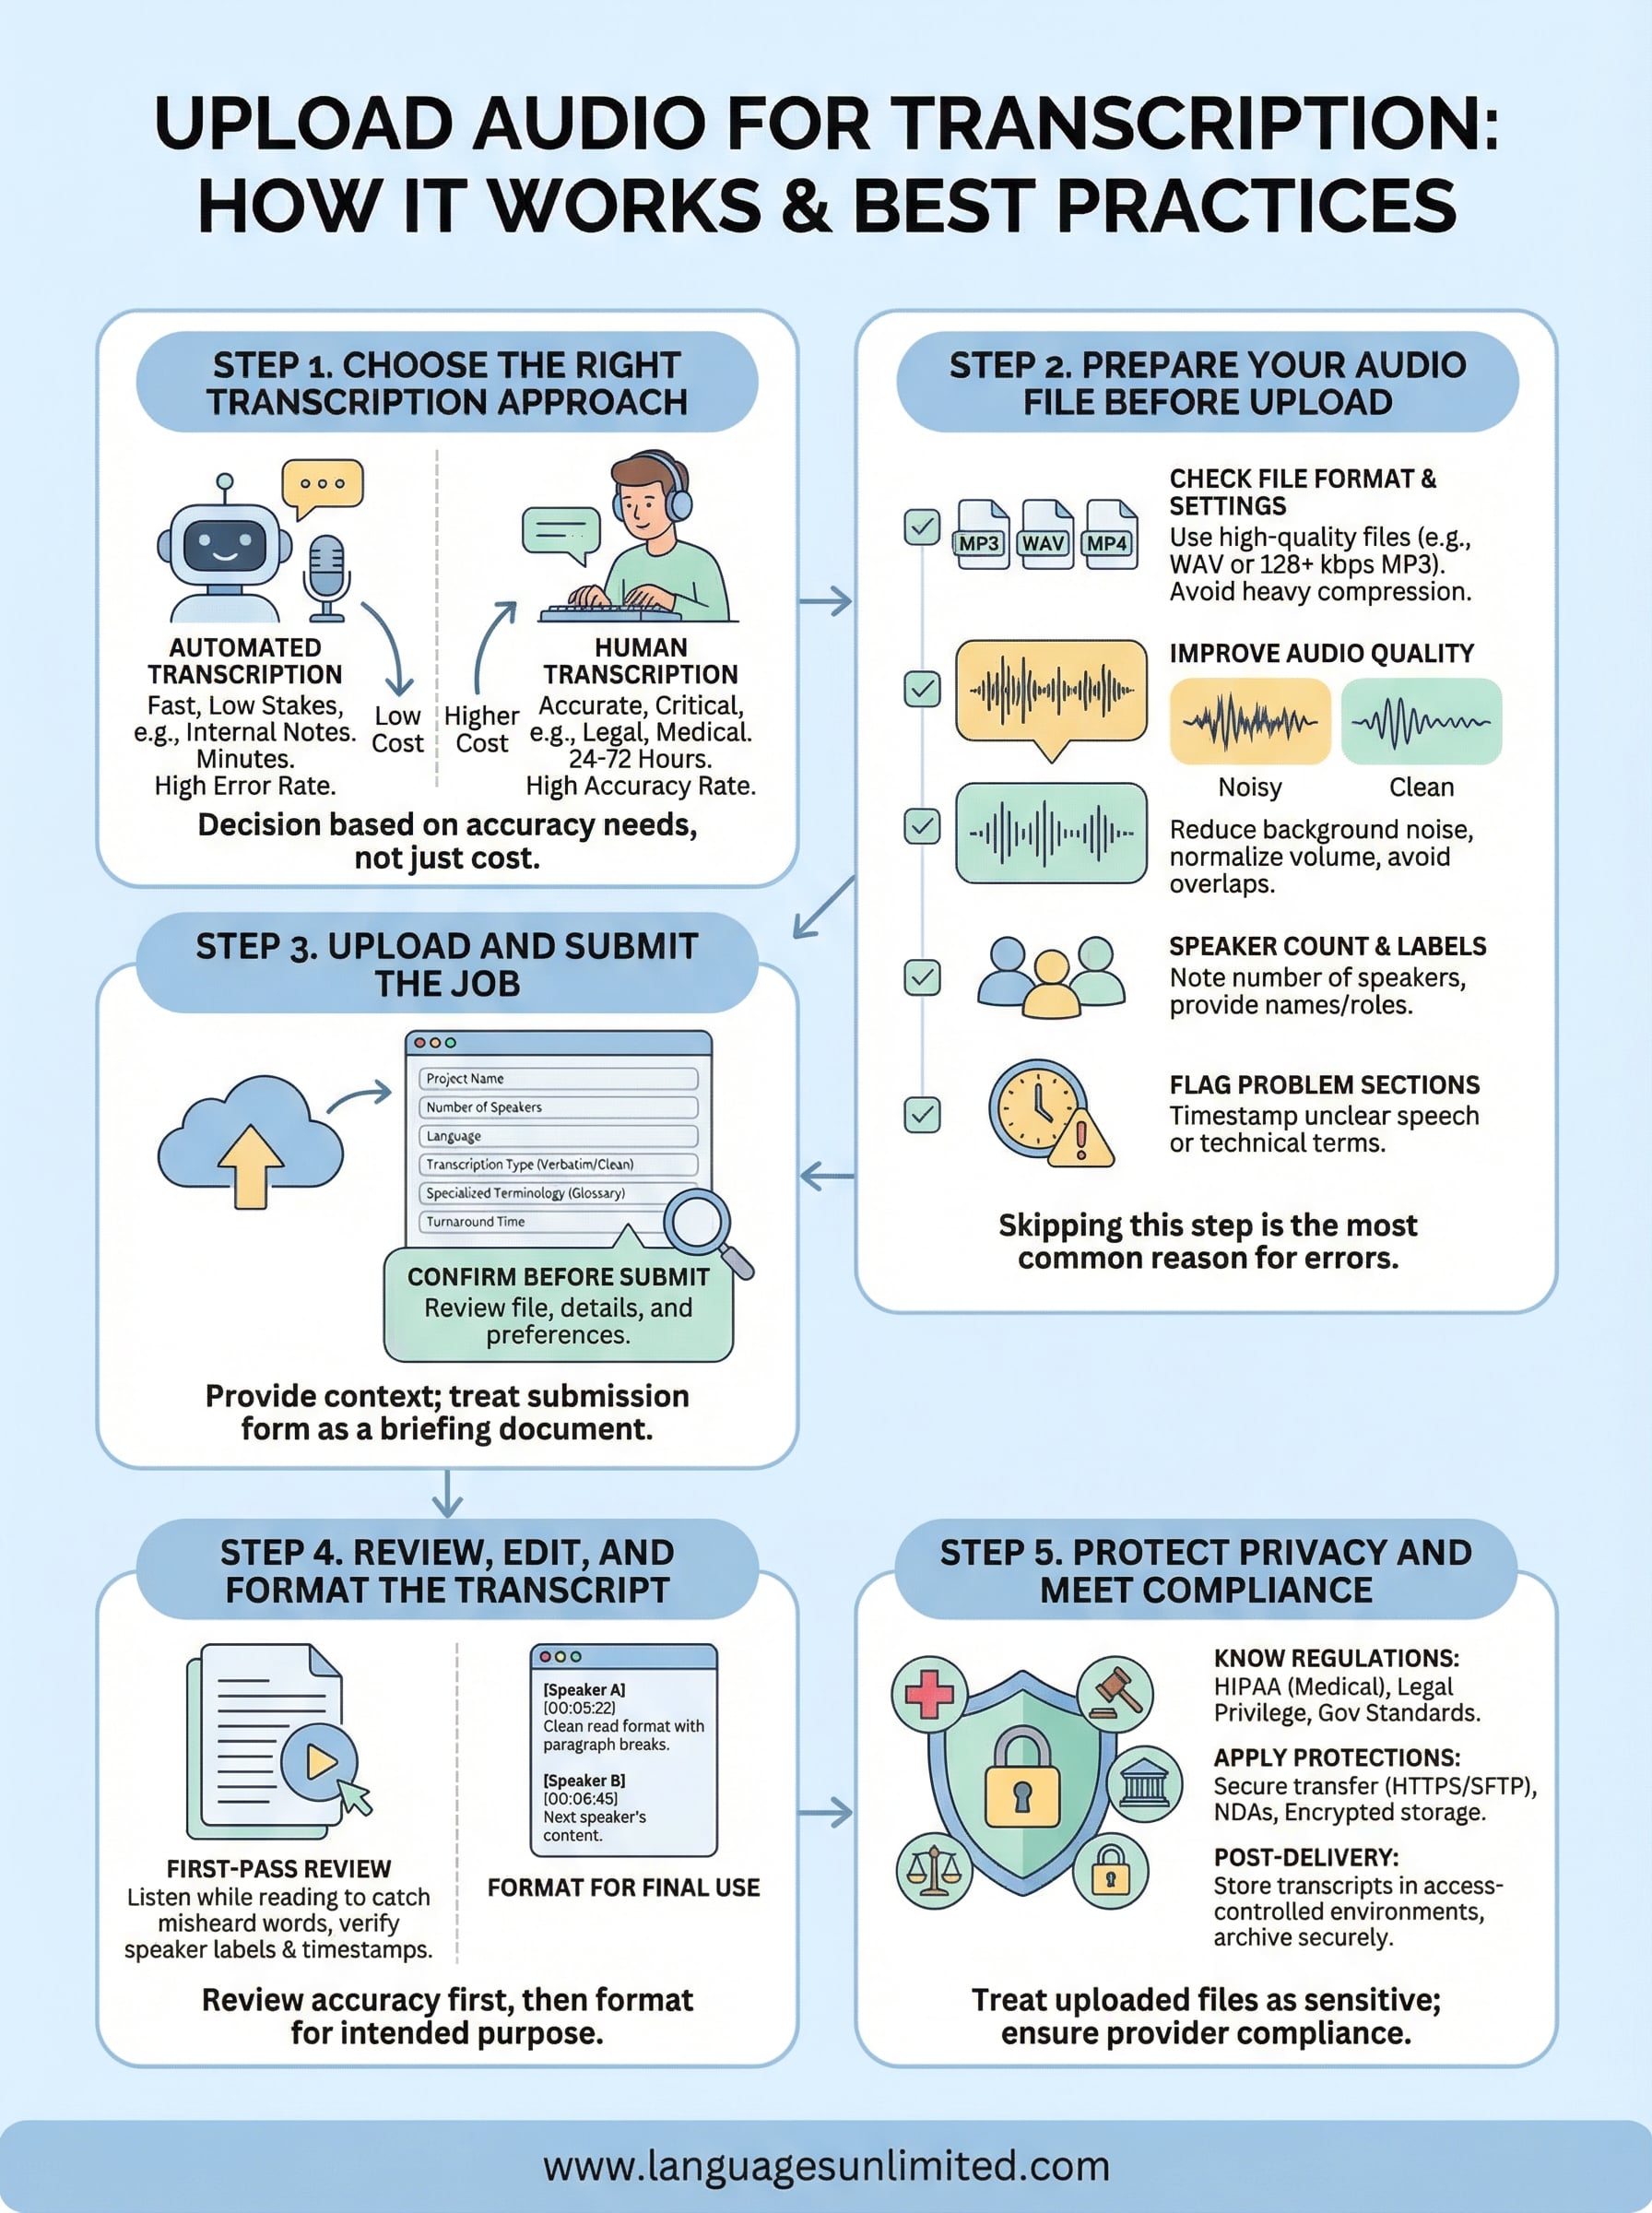
Step 1. Choose the right transcription approach
Before you upload audio for transcription, decide which type of service fits your project. The two main options are automated transcription and human transcription, and each comes with real trade-offs in cost, accuracy, and turnaround time. Choosing the wrong one upfront wastes time and creates extra editing work later.
Automated vs. human transcription
Automated transcription uses speech recognition software to process your audio file and generate a raw text document, often within minutes. Modern platforms have improved considerably, but accuracy still depends heavily on audio quality, speaker clarity, and the presence of specialized terminology. If your recording includes multiple speakers, strong accents, or industry-specific language, automated output typically requires significant manual correction before it’s usable.
Human transcription assigns your file to a trained professional who listens carefully and types out the content with contextual understanding. This approach handles complex recordings, overlapping speakers, and specialized vocabulary far more reliably than automated systems. Turnaround time runs longer, typically 24 to 72 hours depending on file length and complexity, but the accuracy rate is significantly higher. For legal depositions, medical consultations, or government proceedings, human transcription is the standard.
The downstream use of your transcript should drive the decision, not upfront cost alone.
When each approach fits your project
Use this table to match your project type to the right transcription method before you commit to a service:
| Project Type | Recommended Approach | Primary Reason |
|---|---|---|
| Internal meeting notes | Automated | Low stakes, fast turnaround |
| Legal deposition or court recording | Human | Accuracy and terminology are critical |
| Medical consultation | Human | Clinical language, compliance requirements |
| Podcast or interview | Automated + review | Moderate accuracy is acceptable |
| Multilingual or heavily accented audio | Human | Speech recognition struggles with accents |
| Government or public record | Human | Precision and compliance required |
A low-cost automated transcript filled with errors costs more to fix than a professionally transcribed document delivered accurately the first time. Review this table against your actual project requirements, then select your approach before you move to file preparation. Getting this decision right sets up every step that follows.
Step 2. Prepare your audio file before upload
Before you upload audio for transcription, take a few minutes to audit what you’re submitting. Skipping this step is the most common reason projects come back with errors, missing words, or higher-than-expected correction costs. A little preparation on your end reduces back-and-forth with your provider and gets you a cleaner, more accurate transcript in less time.
Check your file format and settings
Your transcription provider will typically accept MP3, WAV, MP4, and M4A formats, but not all formats deliver the same results. WAV files preserve audio data without compression, making them the strongest option for critical recordings like depositions or medical consultations. If you’re working with a compressed format like MP3, aim for a bitrate of at least 128 kbps to preserve enough audio detail for accurate transcription. Anything lower introduces artifacts that make speech harder to interpret, whether by a human reviewer or an automated system.
If you’re converting from one format to another before uploading, always export from the highest-quality version of the original file you have on hand.
Improve audio quality before you submit
Your recording may need minor adjustments before it’s ready for transcription. Listen through the full file at least once and flag any sections with heavy background noise, low volume, or overlapping speakers. Many audio editors let you apply basic noise reduction and volume normalization without altering the content of the recording.
Run through this checklist before submitting your file:
- Volume level: Speech should be consistently audible without clipping or sudden drops
- Background noise: Reduce ambient noise if your editing software supports it
- File length: Split recordings over 90 minutes into clearly labeled segments
- Speaker count: Note the number of speakers and provide names or labels where possible
- Problem sections: Add timestamps for any portions with unclear speech, technical terms, or proper nouns
Providing your transcription service with a speaker list and a brief glossary of specialized terms shortens turnaround time and reduces errors across the board. If your audio includes medical terminology, legal phrases, or industry-specific vocabulary, a short reference document gives transcriptionists the context they need to produce an accurate first draft rather than a rough one that requires extensive review.
Step 3. Upload and submit the job
Once your file is ready, the actual submission process is quick, but what you include alongside it directly affects how fast and how accurately the job gets completed. When you upload audio for transcription, you’ll fill out a submission form or intake sheet that asks for project-specific details. What you enter at this stage gives the transcriptionist the context they need before they press play, so treat it as a briefing document rather than a routine form.
What to fill in during submission
Most transcription platforms and professional services prompt you to provide project details alongside your file upload. These fields exist because a transcriptionist who understands the subject matter, speaker count, and any specialized vocabulary before starting will produce a more accurate first draft. Fill everything out, even if some fields seem optional.
Here’s a submission template you can copy and adapt when sending a file to a professional transcription service:
Project Name: [Your file or case name]
File Name: [Exact filename as uploaded]
File Duration: [HH:MM:SS]
Number of Speakers: [Count]
Speaker Names/Roles: [e.g., Dr. Patel (physician), Patient]
Language: [e.g., English US / Spanish]
Transcription Type: [Verbatim / Clean Read / Intelligent Verbatim]
Specialized Terminology: [List key terms, names, acronyms]
Timestamps Required: [Yes / No / Every X minutes]
Turnaround Time Needed: [Standard / Rush]
Confidentiality Notes: [Any NDA or HIPAA requirements]
Additional Notes: [Flag unclear sections with approximate timestamps]
Submitting this information upfront eliminates the majority of back-and-forth that delays delivery and reduces error rates on the final document.
Confirm before you click submit
Before you finalize your upload, run a quick check to catch anything you may have missed. Uploading the wrong file version or forgetting to specify the speaker count are small oversights that create real delays once the job is in queue.
Review these items before submitting:
- File format matches what the service accepts (MP3, WAV, MP4, M4A)
- File is fully uploaded and not still processing on your end
- Speaker names, roles, and a terminology glossary are attached or entered in the notes field
- Turnaround preference is clearly selected
- Your contact email is correct for the delivery notification
Spending two minutes on this checklist before you submit is far less painful than correcting a misrouted or incomplete job after the fact.
Step 4. Review, edit, and format the transcript
Once your file has been processed and delivered, the work isn’t done. Reviewing your transcript before you put it to use is a step that many people skip, especially when working under deadline pressure. Even a well-produced human transcript can contain speaker label errors, missed proper nouns, or formatting inconsistencies that create real problems downstream, particularly in legal or medical contexts.
What to look for in a first-pass review
Your first pass through the document should focus on accuracy, not polish. Listen to the audio while reading the transcript in real time, moving through the file at normal playback speed rather than scanning the text on its own. This method catches errors that a visual read-through misses, particularly misheard words that look plausible on the page but don’t match what was actually said.
Reading the transcript without listening to the audio underneath it is the fastest way to miss a substitution error that changes the meaning of a sentence.
Work through this checklist during your first-pass review:
- Speaker labels: Confirm each label matches the correct voice throughout the document
- Proper nouns: Verify names, locations, case numbers, and product names are spelled correctly
- Technical terms: Cross-check medical, legal, or industry-specific vocabulary against your original glossary
- Timestamps: Confirm they appear at the intervals you requested and align with the audio
- Verbatim accuracy: Flag any sections where speech was paraphrased rather than transcribed as spoken
Format the transcript for its final use
After you complete your accuracy review, format the document to match its intended purpose. A legal transcript follows different conventions than a medical record or a published interview, so apply your organization’s standard before you share or file the document.
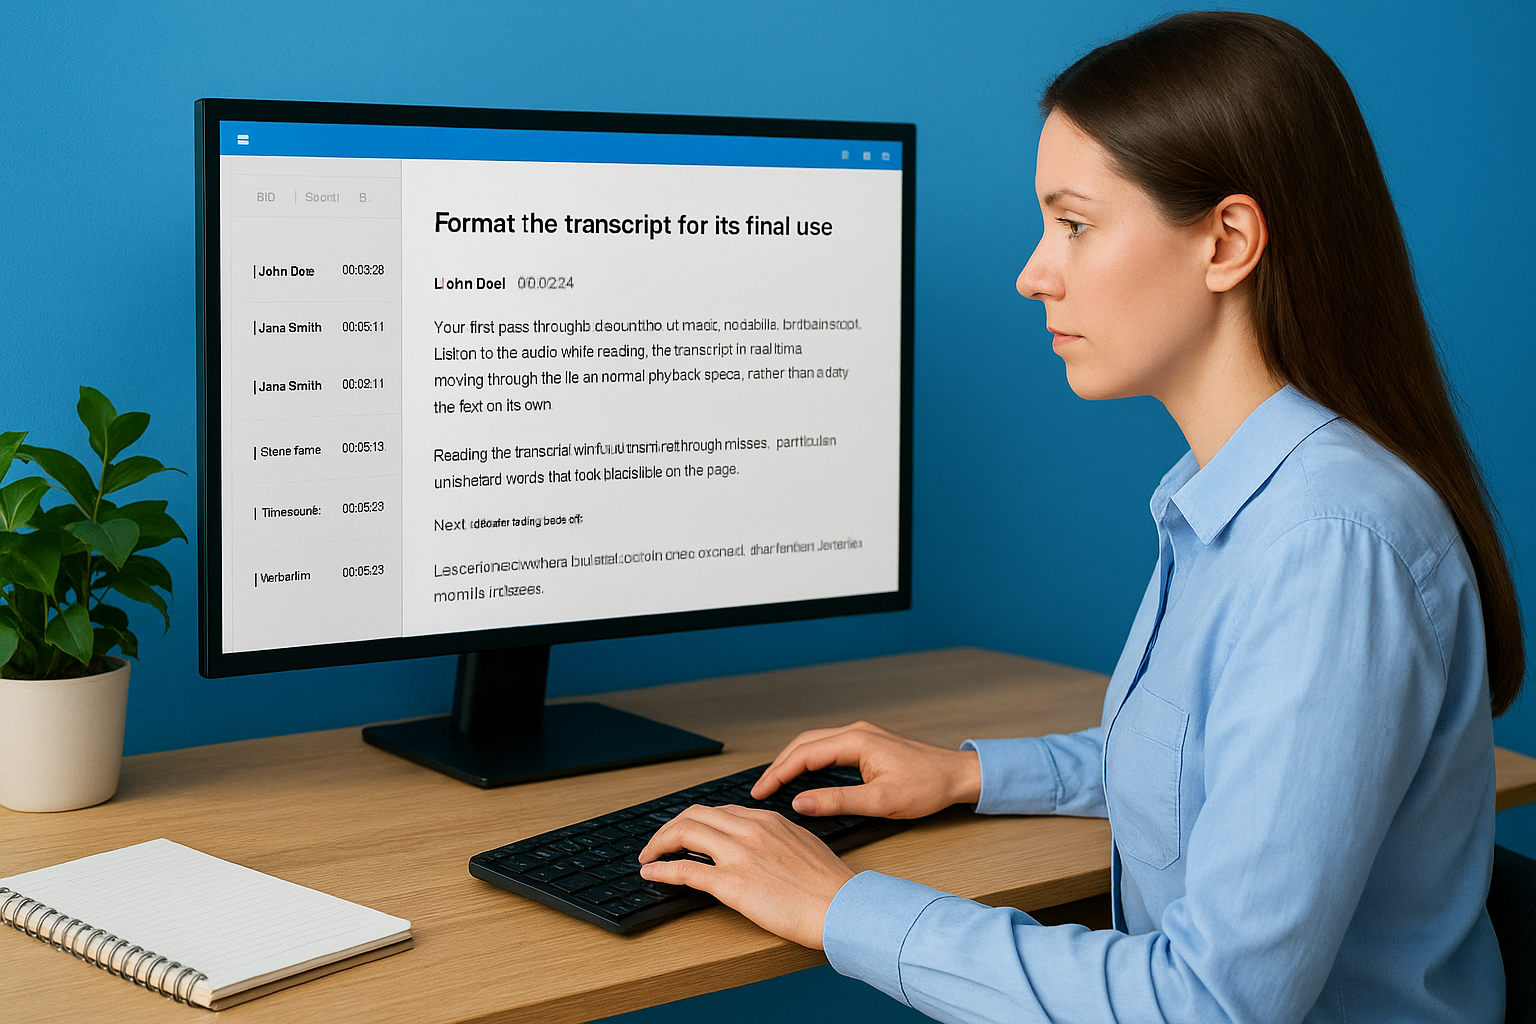
When you originally chose to upload audio for transcription, you selected a transcription type. That choice should guide how you format the final output. Clean read transcripts benefit from paragraph breaks and clear headers; verbatim documents need to preserve every speaker turn with precise labels. Use the template below to structure a clean final document:
[Speaker Name/Role] [HH:MM:SS]
Transcribed text begins here and continues
until the next speaker change or paragraph break.

[Speaker Name/Role] [HH:MM:SS]
Next speaker's content follows here.
Apply consistent formatting, save your final version in the format your organization uses for records, and archive the original audio file alongside it for reference.
Step 5. Protect privacy and meet compliance
When you upload audio for transcription, you’re often handing over a file that contains sensitive personal, medical, or legal information. Treating that upload like any other file transfer creates real liability. Before you submit, you need to understand which regulations govern your content and what steps your transcription provider takes to protect it.
Know which regulations apply to your project
The compliance framework that applies to your transcript depends entirely on what your audio contains and who recorded it. Medical audio is subject to HIPAA, which requires that any service handling protected health information maintains physical, technical, and administrative safeguards. Legal recordings may fall under attorney-client privilege rules or court confidentiality requirements. Federal government audio often involves data handling standards under NIST or FedRAMP, depending on classification level.
Your transcription provider’s compliance certifications should be the first thing you verify before sharing any file that contains personally identifiable or sensitive information.
Ask your provider directly whether they sign Business Associate Agreements (BAAs) for HIPAA-covered content and whether their platform meets Section 508 accessibility standards if you’re working in a federal context. A provider that can’t answer those questions directly is not equipped to handle regulated content.
Apply these protections before and after upload
Protecting your content is not only the provider’s responsibility. Your own handling of the file before and after submission matters just as much. Follow this checklist to reduce exposure at every stage of the transcription workflow:
Before Upload:
- Remove unnecessary metadata from your audio file
- Transfer files only over encrypted connections (HTTPS or SFTP)
- Confirm your provider uses end-to-end encryption for stored files
- Verify the provider's data retention policy (how long they keep your audio)

During Submission:
- Note any NDA requirements in the project notes field
- Specify HIPAA or legal confidentiality requirements explicitly
- Use a secure file transfer method rather than unencrypted email

After Delivery:
- Store final transcripts in a **password-protected or access-controlled environment**
- Archive the original audio file securely, not in a shared folder
- Delete temporary copies from personal devices after the project closes
Applying these controls consistently across every transcription project keeps your organization compliant and protects the individuals whose voices appear in your recordings.
Next steps
You now have a complete process for how to upload audio for transcription, from choosing the right service to protecting sensitive files after delivery. Each step builds on the one before it, and skipping any of them tends to show up in your final transcript as errors, delays, or compliance gaps that take real time to fix.
Start with your next recording or backlog of audio files and work through the checklist in this guide before you submit anything. Good preparation at the file level consistently produces better transcripts, shorter turnaround times, and fewer corrections on your end.
If your organization handles legal, medical, or government audio that requires both accuracy and compliance, contact the Languages Unlimited team to discuss your transcription project. Our network of over ten thousand language professionals covers hundreds of languages and dialects, and we’ve handled complex, sensitive transcription work across every major sector since 1994.